Back to list of FAQs
How do I add additional tables to an existing filing?
Use the “Add document” button in the Actions menu to add the Word document containing the additional tables to your existing filing.
For example, if you needed to replace your balance sheet and cash flow statement in your filing, all you would need to do is upload a Word document containing your new balance sheet and cash flow statements.
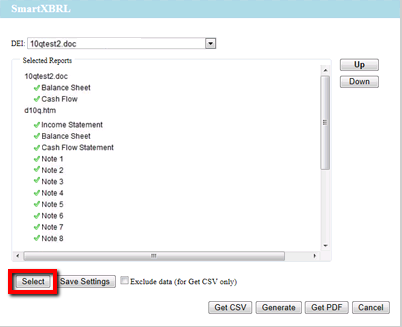
Once you have done that, click “Validate and Generate XBRL” in the Actions menu. Then click on the Select button.

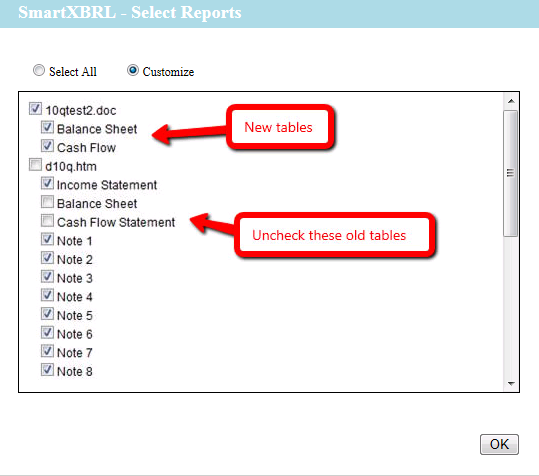
Now you can include those specific tables from the new Word document in the final XBRL output (see screenshot below). Make sure “Customize” is selected and then check or uncheck the documents that you want included or exlude from the final output. In this case, we are excluding the balance sheet and cash flow statement from the d10q.htm, and we are including the ones under 10qtest2.doc.

With little effort on your part, we can detail tag your XBRL data quickly and accurately using our revolutionary cloud-based SmartXBRL software. Contact us to get started |
|
- Dena, Magnum Group