


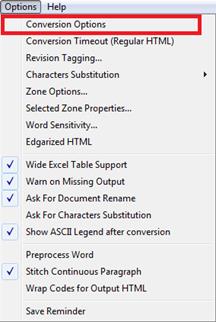
Click Conversion Options from the following menu or toolbar, or use the keyboard shortcut to access all EDGAR ASCII Conversion Options:
Options > Conversion Options
![]()
Shift+F8
The following dialog box will appear:
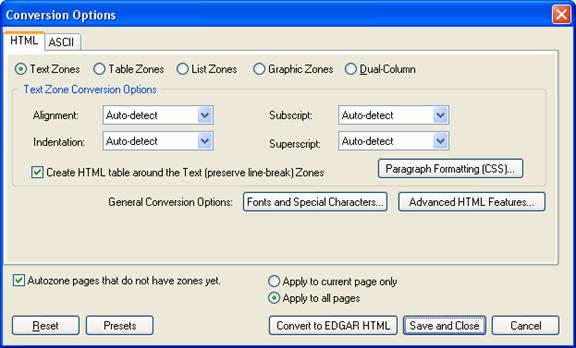
Go to the ASCII Tab. Click the Table Zone radio button to access ‘Table Zone Conversion Options’.

This allows you to set the Table Zone Conversion options for EDGAR ASCII output.
Note: All the Table options you select here will be applied to all the corresponding table zones within the document.
The following dialog box will appear:
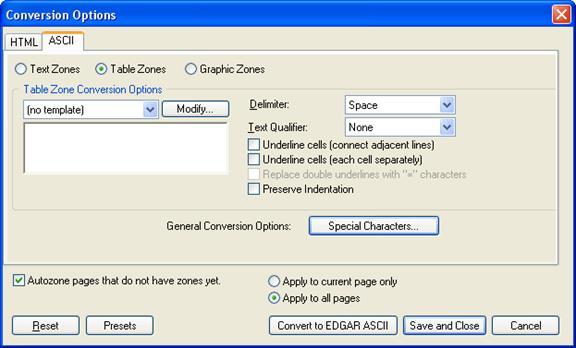
You can set a template that can be applied to some or all tables in the EDGAR ASCII document(s). Click the drop down box and select a template to apply the template to the EDGAR ASCII document. For example, selecting the template shown below will produce tables with center alignment and single underline:

To add, delete, or modify a template, simply click the ‘Modify’ button. The following dialog box will appear:
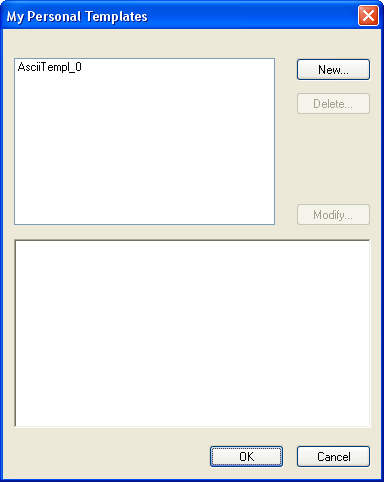
Click ‘New…’ to make the following dialog box appear:
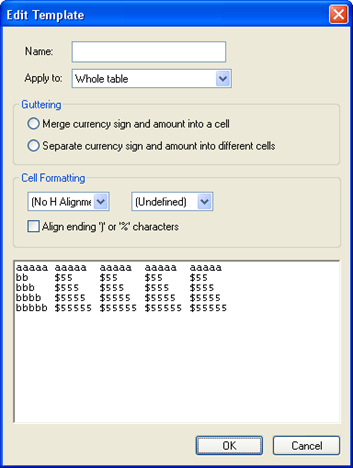
You can put the name of the template in the name column of this window.
From the Apply to drop-down menu, you can assign whether the specifications you choose apply to:
i. Whole table
ii. Header Row
iii. Last Row
iv. Left Column
v. Right Column
vi. Odd Rows
vii. Even Rows
viii. Odd Columns
ix. Even Columns
i. Merge currency sign and amount into a cell
This option allows you to put the currency ($) symbol and the amount of money into the same column.
ii. Separate currency sign and amount into a different cell
This option allows you to put the currency ($) symbol into a separate column from the amount of money.
i. Preference 1 specifies alignments

It has four drop-down alignment options:
o No H Alignment
o Left
o Center
o Right
ii. Preference 2 specifies underlines

It has four drop-down options:
o Undefined (no specifications assigned)
o No Underline
o Single (puts single underline below the text)
o Double (puts double underline below the text)
iii. Align ending ‘)’ or ‘%’ characters
This option allows you to put space between ‘)’ or ‘%’ and the preceding digits.
Shows the current format that you specify.
Select a template and click ‘Delete…’ button to bring up the following menu:
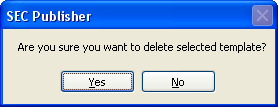
Click ‘Yes’ to continue or ‘No’ if you do not want to delete the selected template.
Select an entry and press ‘Modify’ button to modify a template. The following dialog box will appear:
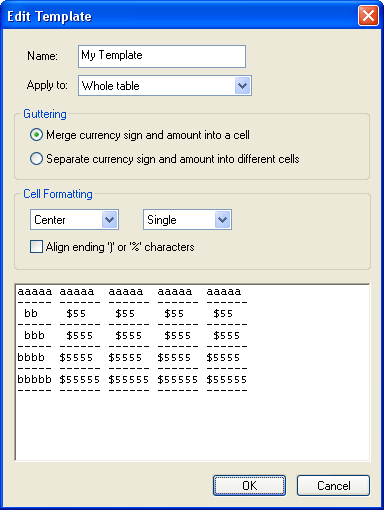
You can name the template in the name column of this window.
From the Apply to drop-down menu, you can assign whether the specifications you choose apply to:
i. Whole table
ii. Header Row
iii. Last Row
iv. Left Column
v. Right Column
vi. Odd Rows
vii. Even Rows
viii. Odd Columns
ix. Even Columns
i. Merge currency sign and amount into a cell
This option allows you to put currency ($) symbol and amount into the same column.
ii. Separate currency sign and amount into a different cell
This option allows you to put currency ($) symbol into a separate column from the amount of money.
i. Preference 1 specifies alignments

It has four drop-down alignment options:
o No H Alignment
o Left
o Center
o Right
ii. Preference 2 specifies the underline(s) to be used

It has four drop-down options:
o Undefined (no specifications assigned)
o No Underline
o Single (puts single underline below the text)
o Double (puts double underline below the text)
iii. Align ending ‘)’ or ‘%’ characters
This option allows you to put space between ‘)’ or ‘%’ and the preceding digits.
Shows the current format that you specify.
The task of the delimiter is to separate the contents of the different columns. You can select to set the type of delimiter for the text. The options are:
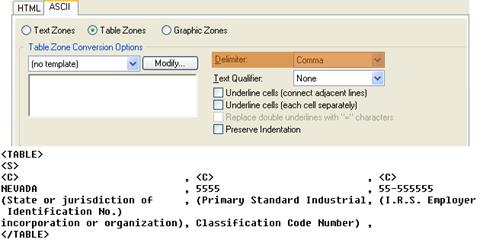
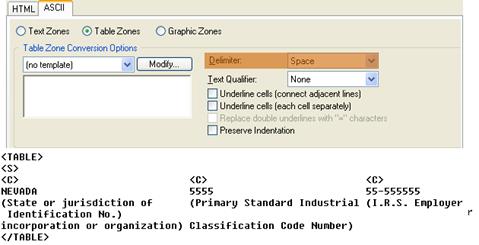
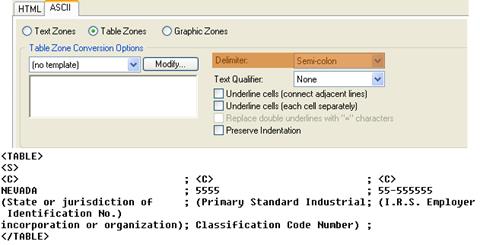
Tip: Based on what type of delimiter is used, the columns in the ASCII tables will be separated by that delimiter.
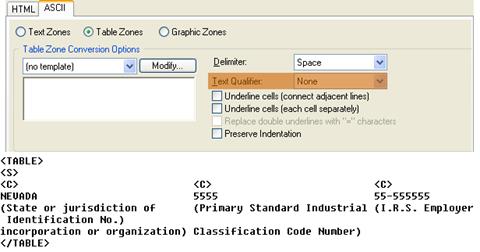
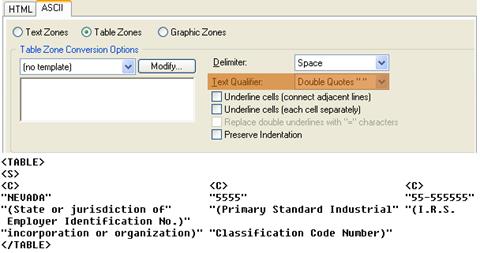
The text
qualifier option applies the chosen text to each cell of the table.
You can select to set the type of text qualifier. The options
are:
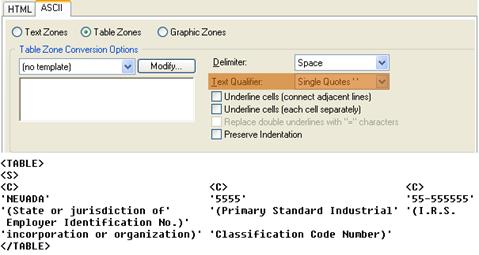
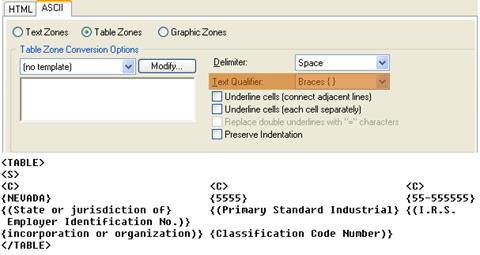
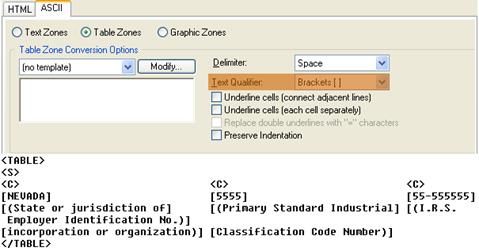
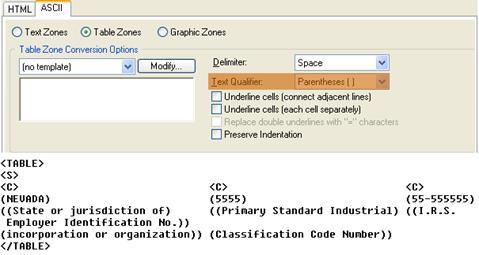
This option connects underlines in adjacent cells.
This option underlines each cell of a table individually.
This option replaces double underlines of a table with the “=” character. Please check either Underline cells (connect adjacent lines) or Underline cells (each cell separately) to activate this selection.
This option preserves the indentation of the source document.
Related Topics
©1999-2022 BCL Technologies. All Rights Reserved. Unauthorized duplication or distribution prohibited.
| Converted from CHM to HTML with chm2web Standard 2.85 (unicode) |